My name is Jena, and I've been nick-named the Vista Print Goddess.
Feel free to email me through the contact form on the home page.
Ruffled Tree Skirt
Have you seen the GORGEOUS ruffled tree skirt floating around on Pinterest? I've been in love with it since I first laid eyeballs on it. But my husband and I have a tiny apartment, too much stuff, two cats, and a dangerous-tailed-dog, so we usually skip the tree.
We've been married for over two years now, but I'm still super close with 19 other women who got married the same month. FastForward to this Christmas, and it's our third Secret Santa exchange. The girl I drew is craaaaaazy easy. I started by cruising her Pinterest boards, and this ruffled tree skirt was on one of her boards as well. Why not?
Things to note:
-the "original" (to me) pinned tree skirt was hot glued. There's nothing wrong with that, and it's a great alternative for folks who don't sew. My concern is that I'm not sure how long it will hold up. I mean, obviously she's going to use this for the rest of her life and it will get passed down through the generations because it's so awesome (har har, but my point stands).
-Chantel at Done Over Decor (my "original") used burlap and a red fabric she had on hand. I found a medium-dark burlap with a tiny bit of metallic (think 98% burlap with 2% metallic) at Joann's for half off (so $4/yd). I also bought a dark maroony red (called bordeaux) at half off (also $4/yd). In all, I bought 4 (maybe 5?) yards of each (to make two).
-I used Dollar Store tree skirts (bought 3, all told).
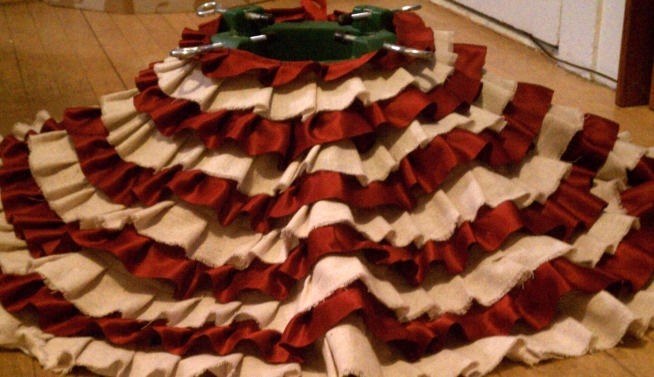
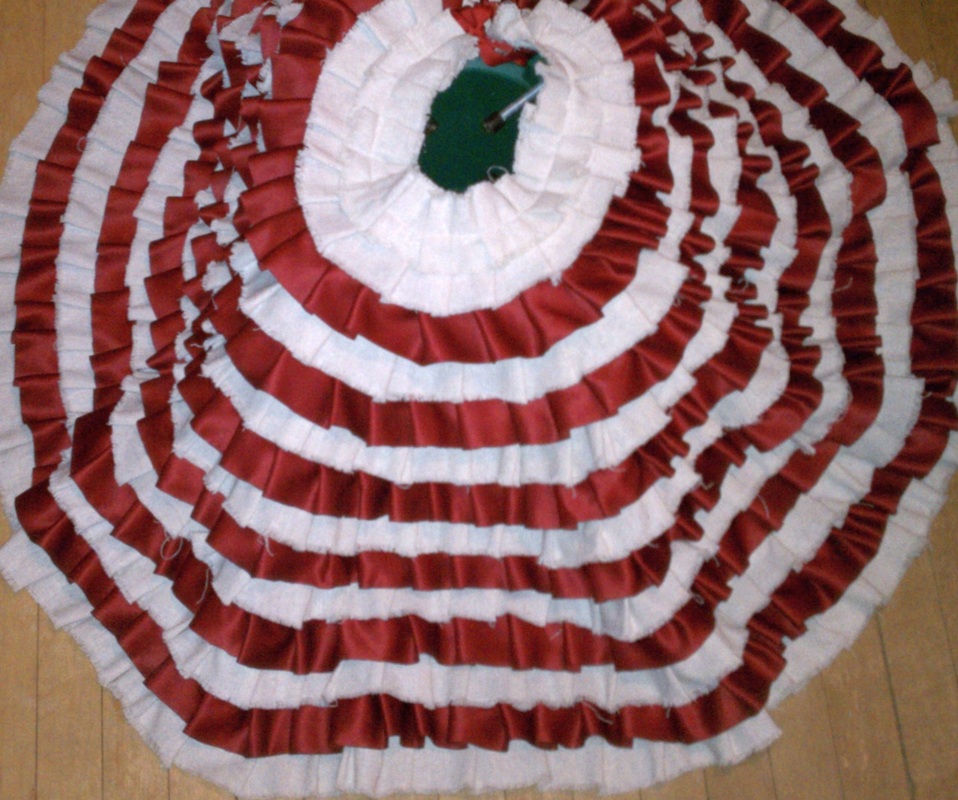
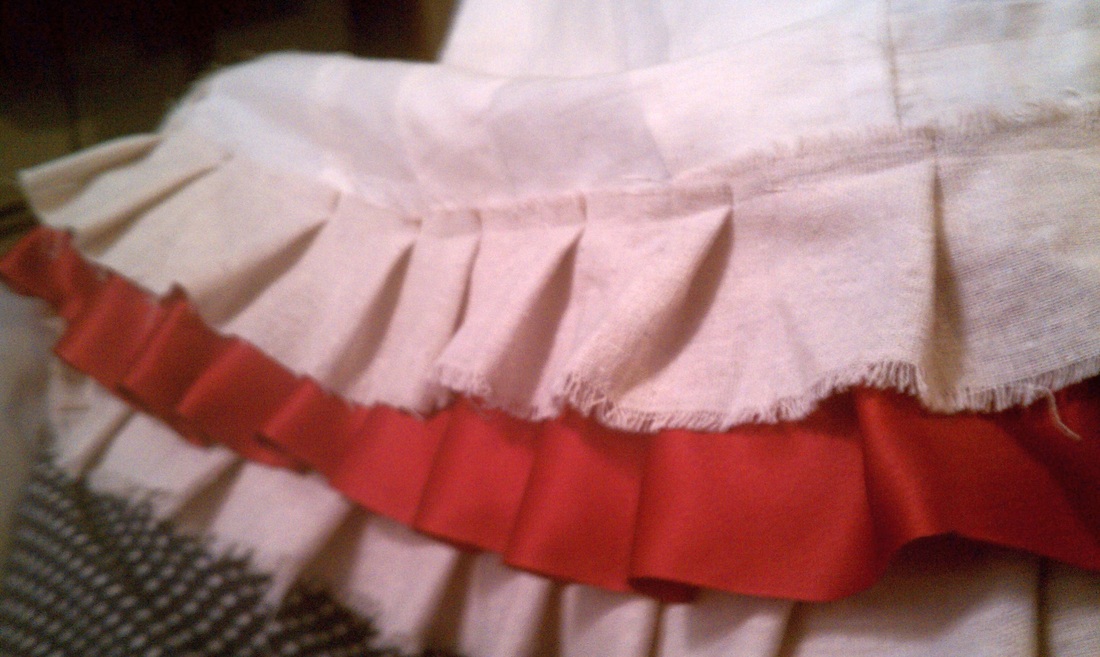
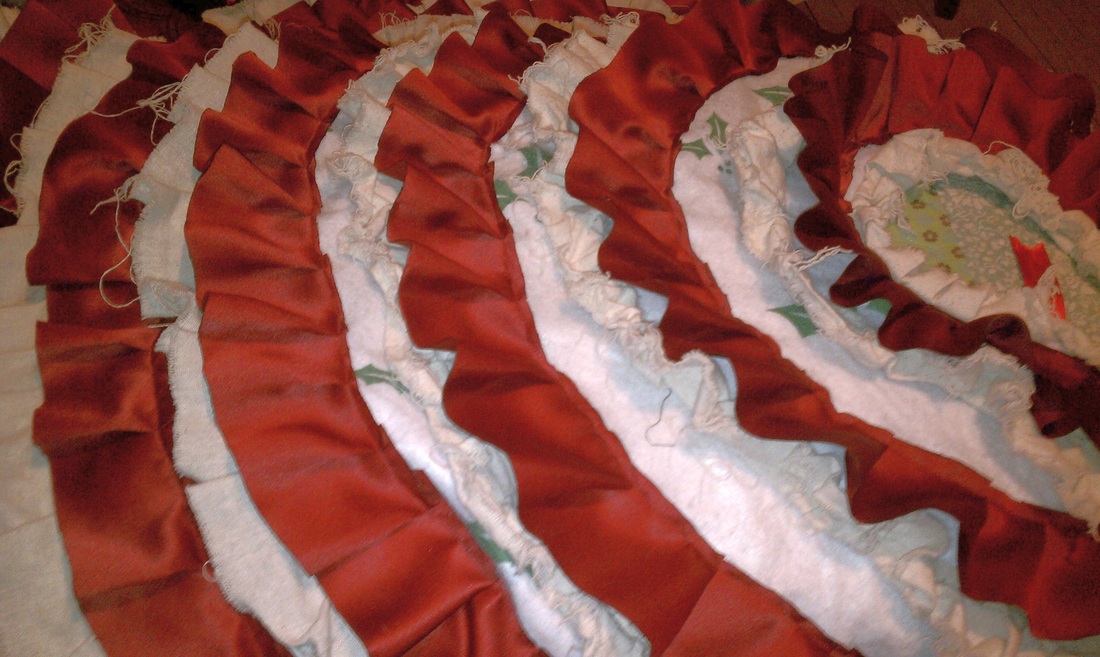
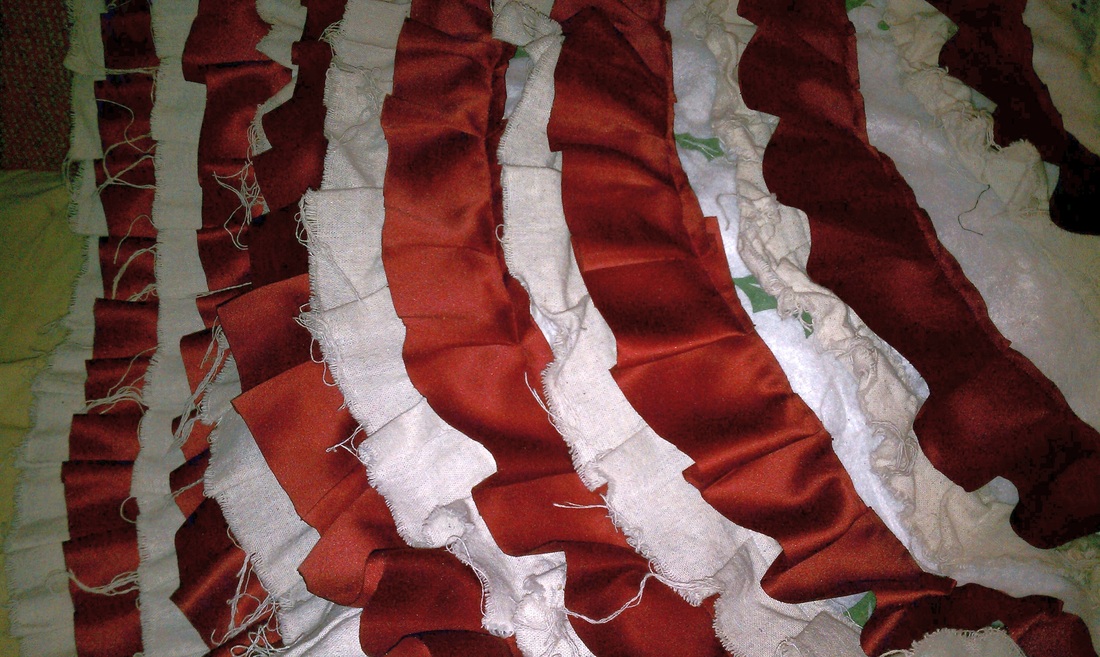
1) The hardest part of this project is cutting these stupid strips. I did mine at about 2.5" and after trial and error, found that using an oak tag strip of paper and an iron was the easiest way to get uniform strips. My inspiration left both fabrics with raw edges. I loved the raw edge of the burlap, but my red fabric looked weird. So I "burned" the edges of the raw satin by running it close to a candle flame. Not hard, just a pain in the butt.
2) Starting at the outside edge of the Dollar Store tree skirt, I started creating ruffles with straight pins. I did it really organically, without measuring. I varied the "depth" of the ruffles and the spacing between them. I sewed that row down, and pinned the next row, in the other fabric. Rinse and repeat.
I had to make a second trip back to the Dollar Store for that third tree skirt. I was decently happy with the first tree skirt, but I made some changes when I started the second one. Once I realized how much I liked the changes, I just couldn't leave that first one alone. So I painstakingly ripped alllllll those seams in allllll those rows so I could reuse those strips.
We've been married for over two years now, but I'm still super close with 19 other women who got married the same month. FastForward to this Christmas, and it's our third Secret Santa exchange. The girl I drew is craaaaaazy easy. I started by cruising her Pinterest boards, and this ruffled tree skirt was on one of her boards as well. Why not?
Things to note:
-the "original" (to me) pinned tree skirt was hot glued. There's nothing wrong with that, and it's a great alternative for folks who don't sew. My concern is that I'm not sure how long it will hold up. I mean, obviously she's going to use this for the rest of her life and it will get passed down through the generations because it's so awesome (har har, but my point stands).
-Chantel at Done Over Decor (my "original") used burlap and a red fabric she had on hand. I found a medium-dark burlap with a tiny bit of metallic (think 98% burlap with 2% metallic) at Joann's for half off (so $4/yd). I also bought a dark maroony red (called bordeaux) at half off (also $4/yd). In all, I bought 4 (maybe 5?) yards of each (to make two).
-I used Dollar Store tree skirts (bought 3, all told).
1) The hardest part of this project is cutting these stupid strips. I did mine at about 2.5" and after trial and error, found that using an oak tag strip of paper and an iron was the easiest way to get uniform strips. My inspiration left both fabrics with raw edges. I loved the raw edge of the burlap, but my red fabric looked weird. So I "burned" the edges of the raw satin by running it close to a candle flame. Not hard, just a pain in the butt.
2) Starting at the outside edge of the Dollar Store tree skirt, I started creating ruffles with straight pins. I did it really organically, without measuring. I varied the "depth" of the ruffles and the spacing between them. I sewed that row down, and pinned the next row, in the other fabric. Rinse and repeat.
I had to make a second trip back to the Dollar Store for that third tree skirt. I was decently happy with the first tree skirt, but I made some changes when I started the second one. Once I realized how much I liked the changes, I just couldn't leave that first one alone. So I painstakingly ripped alllllll those seams in allllll those rows so I could reuse those strips.
|
|
|
Round two:
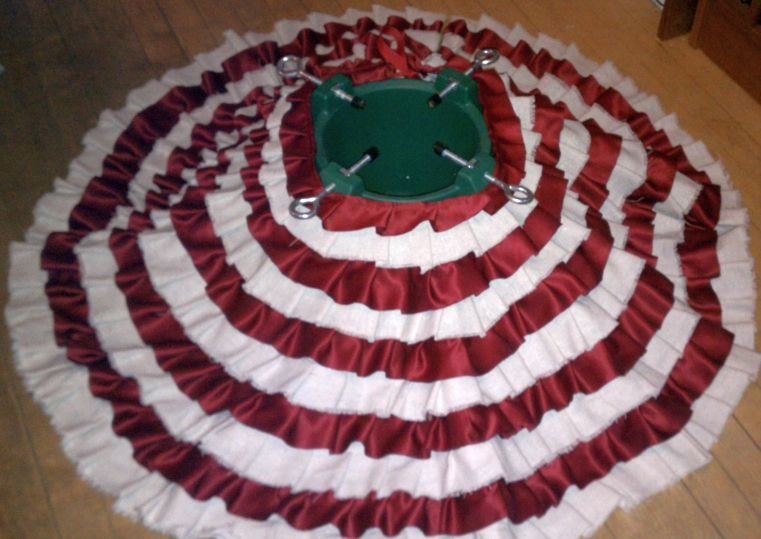
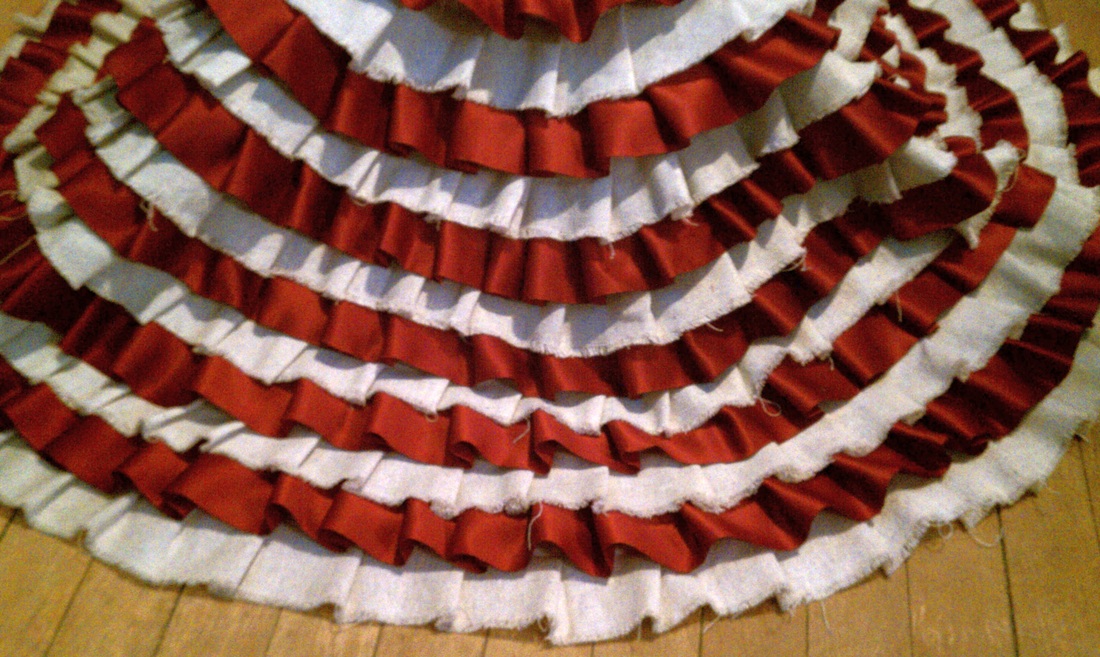
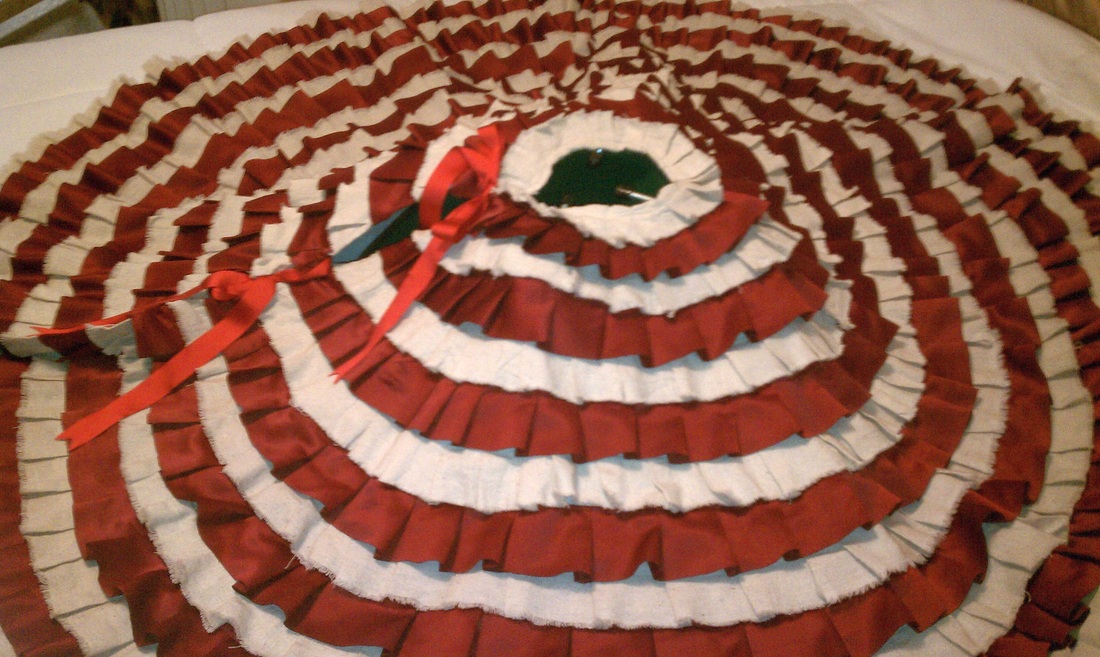
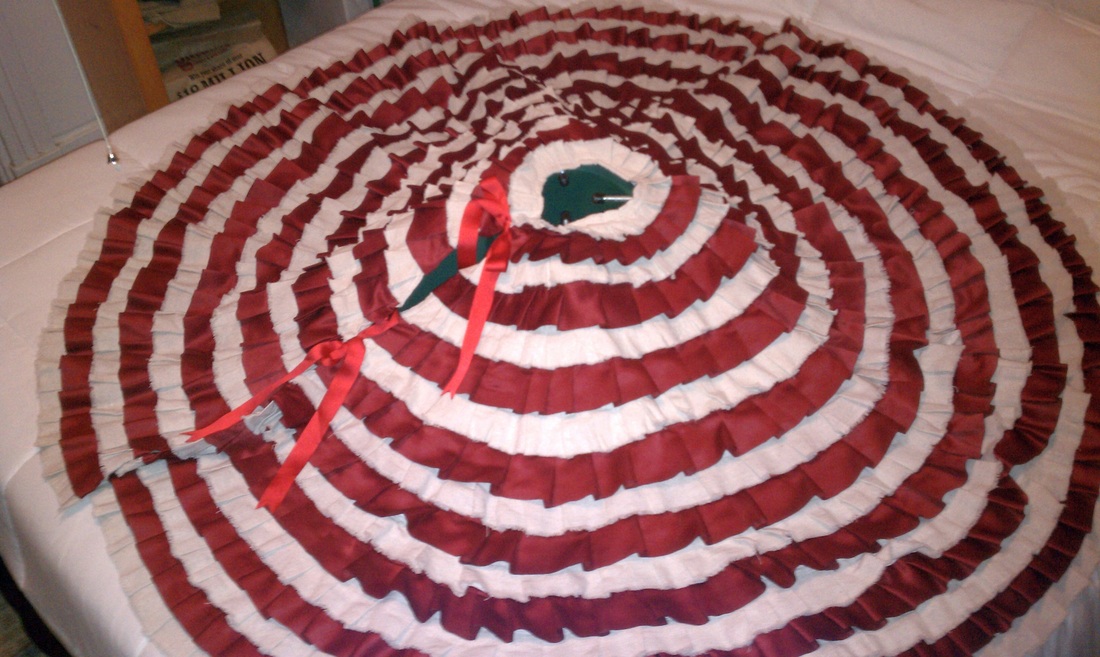
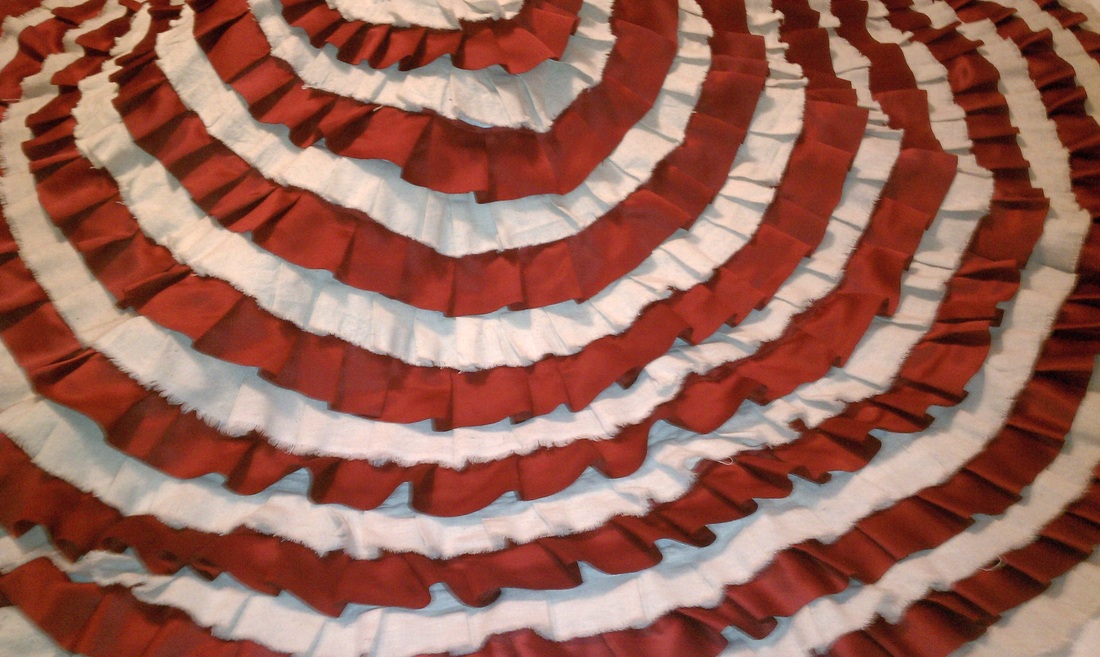
The changes I made? When I was first going through I only bought two yards of each fabric, so I was "stingier" with my ruffles. They weren't as deep, there weren't as many ruffles, and the rows just barely overlapped (maybe 1/2"). After the first one I realized I had way more than half the fabric left. Like I said, it turned out fine, but halfway through the second one I decided I just couldn't leave it alone. So A) I made the ruffles deeper, closer together, and added more rows. And B) I also decided to alternate the direction of the ruffles. So the burlap ruffles are all folded to the right, and the red ruffles are all folded to the left. It's a small thing, I just think it adds more dimension to the finished product.
|
|
Annnnnd round three:
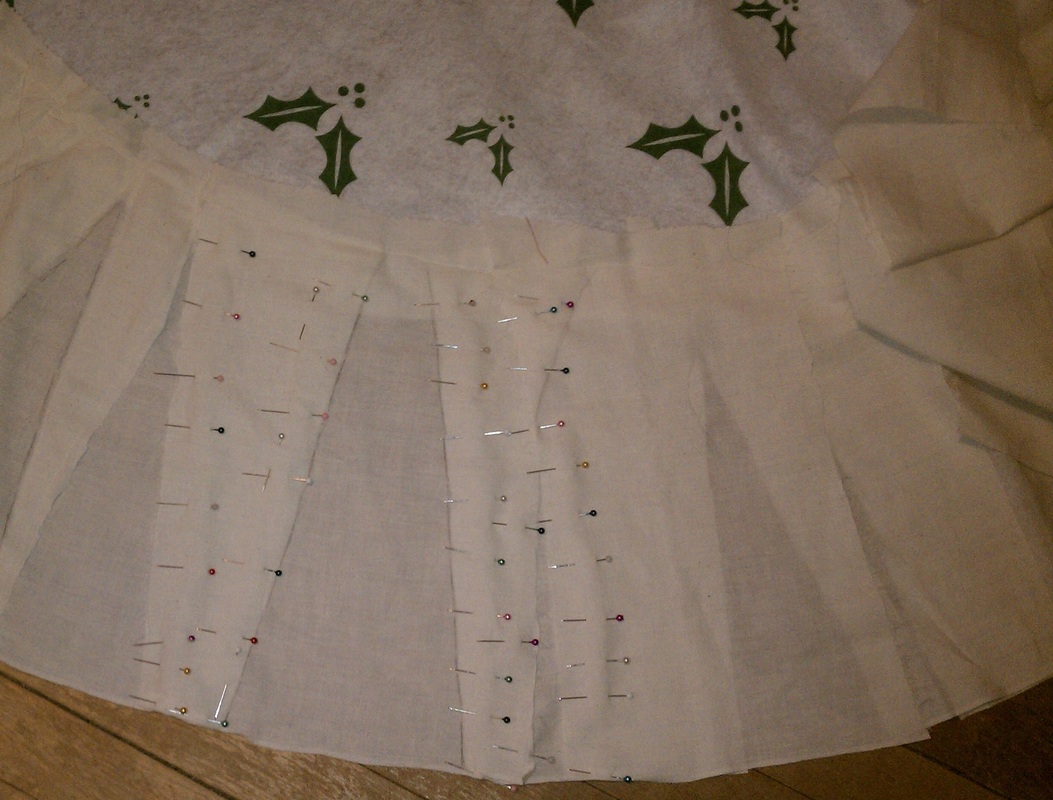
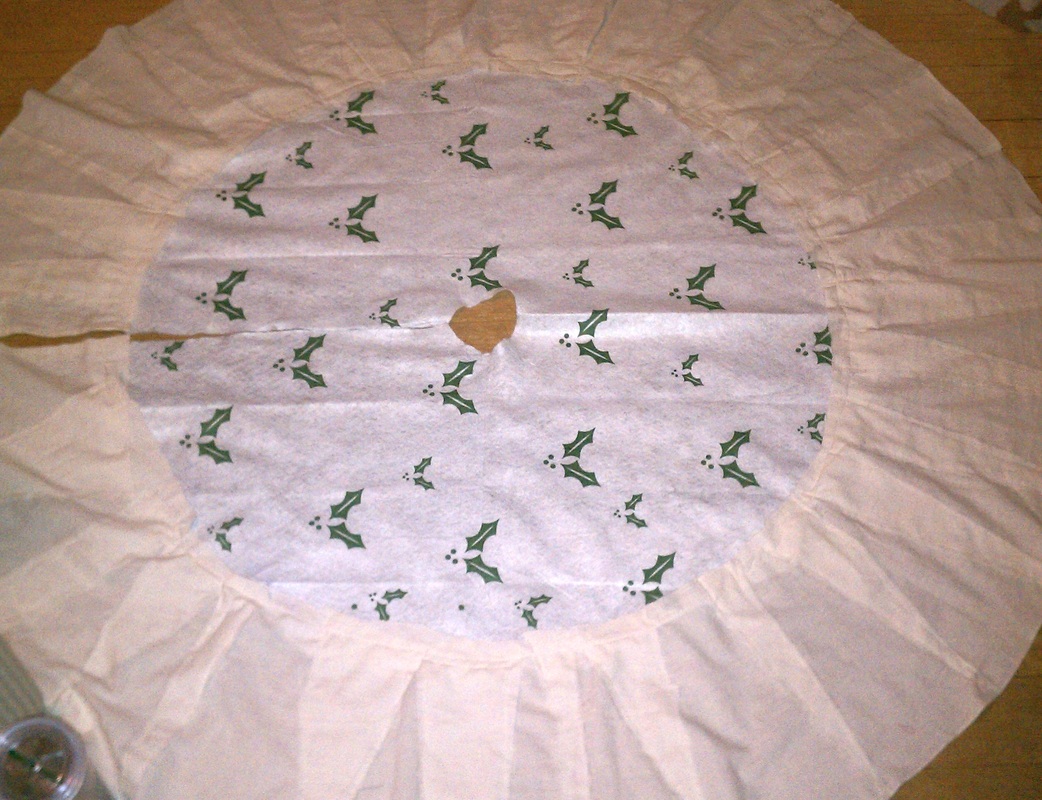
I just couldn't leave well enough alone, could I? Of course not. Average tree skirts start at about 36" and go to about 60". The skirt I bought at the Dollar Store was about 40" across. I decided I wanted mine to be wider (knowing it was going to take more time, effort, and money). I decided I could add the extra width myself, using another fabric I had on hand. It's actually unbleached muslin that I used to cover the seating at our wedding, which I kind of love (a little bit of our wedding under our Christmas tree). However. I'm sure there was an easier way, but I decided to cut approx 5"-8" wide rectangles, and attach them at intervals. Then I pinned and sewed them all together.
|
|
It was a freaking nightmare. TBPH, to do it over again, I would have just purchased the cheapest tree skirt (or table cloth, maybe?) I could find in the size I was looking for. Like I said, I'm happy it was free, and I'm happy there's a little bit of wedding in the skirt, but it's about 12 hours of my life I'm never going to get back! lol.
All in all, I'm crazy happy with them both, and I can't wait to hear what my SS thinks of her gift.
1/11/2013 - This is still an ongoing project... one of those things that sits in a bucket next to my chaise, and I pick it up when I'm watching tv. I'll share progress and thoughts as I go.
This is one of those weird, nit-picky things, but I thought I'd share. To do this over again, I would wash the burlap fabric first thing. I washed the first round, but not the second. When I had them side by side, I could really see the difference. The unwashed fabric is stiff and just doesn't ruffle well. The washed fabric looks nicer and is a softer ruffle. The photo on the left is the washed fabric, unwashed on the right.
|

|
See? It's minor, and like so much else with this project, photos don't do it justice. My current plan is to finish the skirt, and then wash the whole thing.
4/13/13 - So.. washing the whole thing was a HUGE mistake. I promise, I really AM a smart person. I just seem to have a block with this project. Look what happened to the burlap :\
|
|
::facepalm:: Duh, clearly the burlap freaked the eff out. I should have expected it. But, see above, re: mind-block. So I spent a couple hours with Dr. Who and an ironing board. But she's totally gorgeous, right?!
|
|
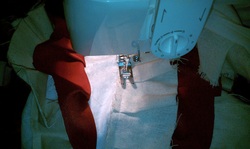
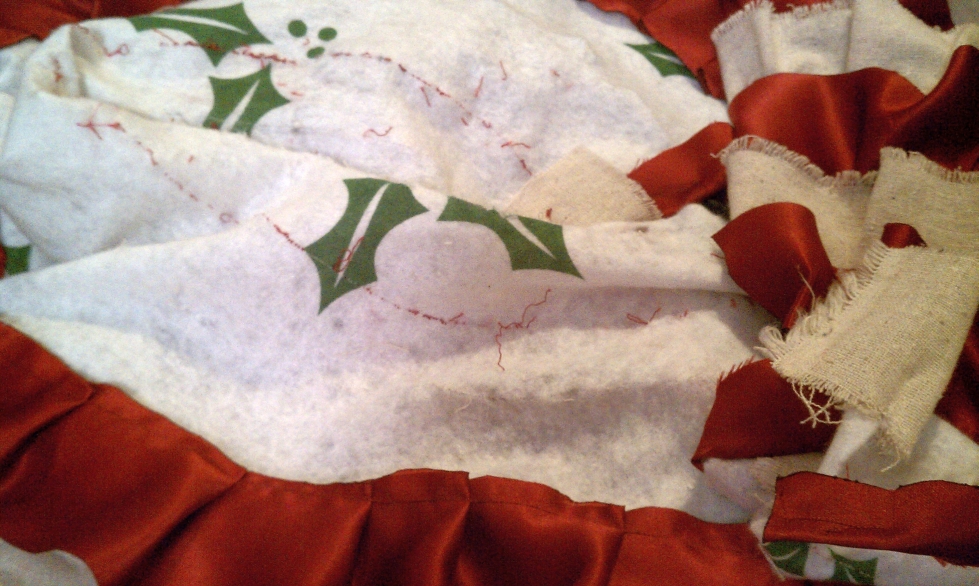
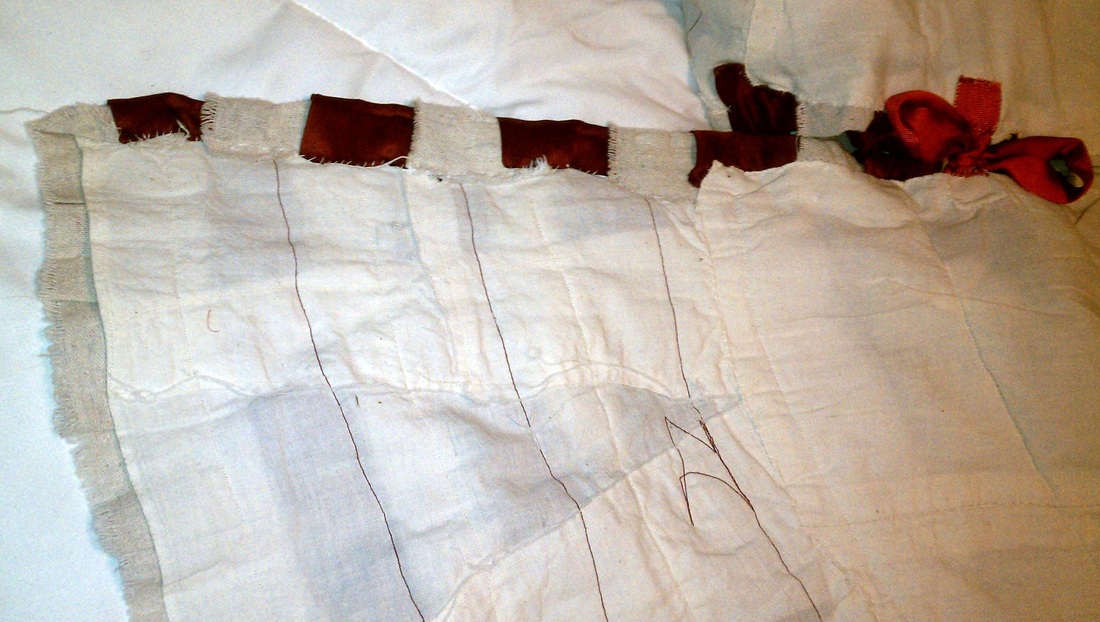
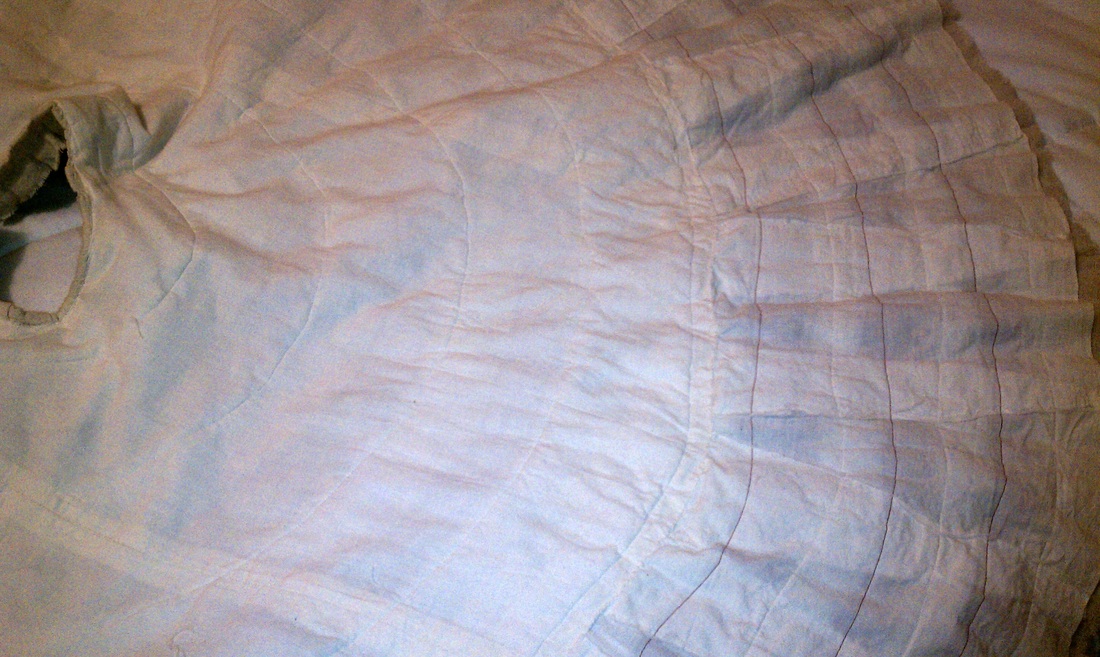
I sewed (instead of hot glued) because I wanted this skirt to last through years of unpacking, using, and repacking. The problem is that Dollar Store felt isn't designed to be handled. And that skirt is HEAVY with all the fabric. Wedding fabric to the rescue again! I sewed several panels together (they were 14" to cover the benches at the wedding), then sewed it to the back of the skirt (just over the felt part). I attached the two by sewing along the line of the burlap ruffles. Then I folded along each side and hand stitched the side edges and the bottom. It was easier to just hand stitch it, and TBH, I could see the light at the end of the project and was a little sad it was going to be done. The left picture is a close up of where I tacked the edges of the bottom down, and to show where the addition and the new backing meet up. The right side is a wider view of the stitching of where the bottom of the new backing meets where I widened the skirt.
|
|
Voila! I looooove her; she's gorgeous. It was a long project that I made way more complicated than it should have been, but I'm thrilled with the way it came out, and I'm really happy I did it.
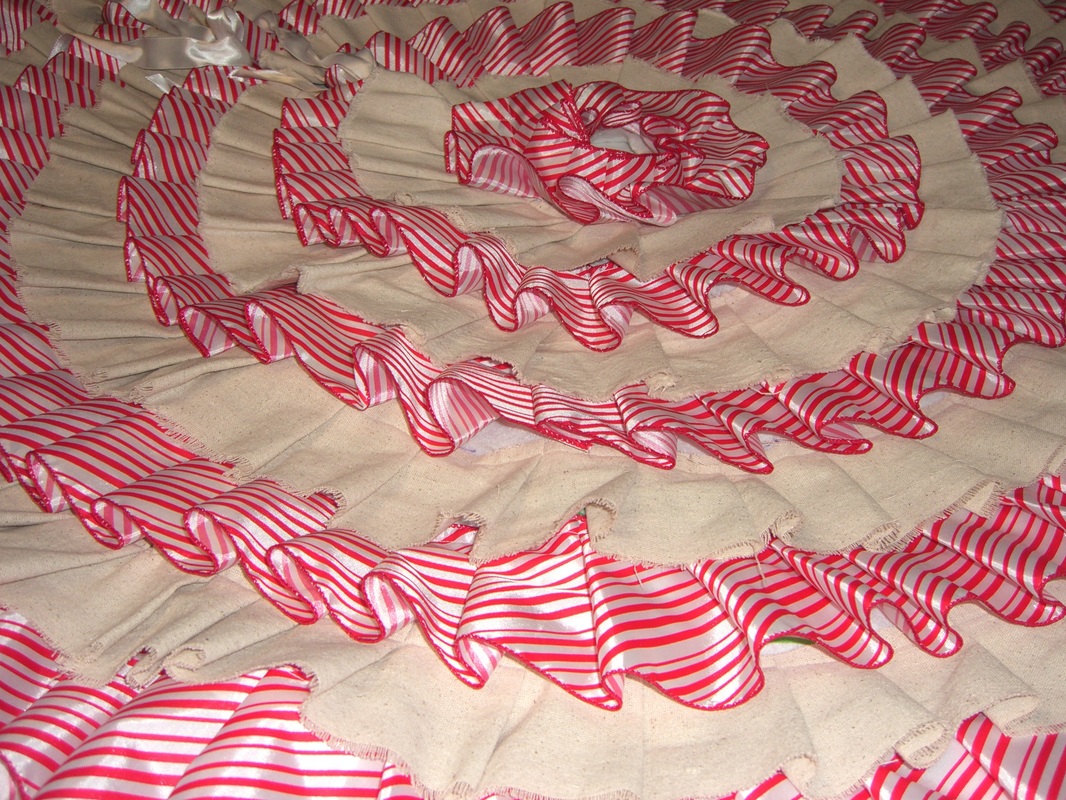
Update, Xmas 2014!
My gorgeous cousin Kate oohed and ahhed about my ruffle tree skirt. So when I drew her name in our family Secret Santa, I instantly knew what to do! I went a slightly different route. I found this adorable candy cane striped ribbon at JoAnn's. It's about 4" wide, if you're careful you can catch some great sales. Or if you plan ahead, you can pick up your ribbon in the after-Christmas clearance. Two rolls got me all the way through a 40" skirt base. And I cut my burlap strips the same width. The bonus of using the ribbon is that the edges are already finished, no worrying about fraying.

|
|
It's cute, right? The candy cane ribbon makes it whimsical, but still lovely.
